Assistance For Deleting Stolen Camera Finder from Firefox
Various Stolen Camera Finder related infections| Ransomware | Systemdown@india.com Ransomware, Yakes Ransomware, Nuke Ransomware, .kyra File Extension Ransomware, Okean-1955@india.com Ransomware, Help_you@india.com Ransomware, Recuperadados@protonmail.com Ransomware, .0ff File Extension Ransomware, Crypton Ransomware, V8Locker Ransomware, CryptXXX Ransomware, DecryptorMax Ransomware or CryptInfinite Ransomware, Mailrepa.lotos@aol.com Ransomware |
| Trojan | Monopoly, Ordpea.A, Trojan.Ransom.DV, wuauclt.exe, Spyeye.gen!A, VVD Trojan, Gen.Backdoor, Win32:Explor-DU, Trojan.Startpage.PN, Grum.E, Injector.gen!AK |
| Adware | Venture, Dope Wars, Adware.SmitFraud, Adware.WinPump, SocialSkinz, TGDC IE Plugin, SelectionLinks, YTDownloader Virus, GatorGAIN, TidyNetwork.com, Agent.lsw |
| Browser Hijacker | Holasearch.com, www1.dlinksearch.com, SecretCrush, Searchab.com, Enormousw1illa.com, U-Search.net, Remarkablesearchsystem.com, Pageset.com, Websearch.pu-results.info |
| Spyware | PhP Nawai 1.1, FirstLook, EliteMedia, ProtejaseuDrive, Surf Spy, EScorcher, Spyware.Ardakey, MessengerPlus, SafeStrip |
Get Rid Of Stolen Camera Finder Easily From The OS
The cyber Hackers have programmed this Stolen Camera Finder OS malware to take benefits from the innocent user. After the infiltration of such harmful threat the functionality of the OS will completely compromised. Along with this Stolen Camera Finder many other harmful threat will be invited to create more damage to the OS. It will immediately open a backdoor which allow the remote hacker to sneak into the OS and steal all the private information from the OS.
Information like, Browser History, OS ID and password, Full OS configuration and even install keylogger to your infected OS. Over and over unwanted redirection will make you redirect, as to bring more threat this Stolen Camera Finder will open multiple of phishing website which bring harmful OS malware. Because of this harmful and malicious activity you must not delay to Get Rid Of such harmful threat from the infected OS. The earlier you Get Rid Of the threat the less you will suffer.

Part 1 : End Stolen Camera Finder Related Task/Process From Windows Task Manager
Part 5 : Start Your OS in Safe Mode With Networking
Part 1 : End Stolen Camera Finder Related Task/Process From Windows Task Manager
- First Open The Task Manager. You can do it in 2 way.
- Right Click on Task Bar and the select Task Manager.
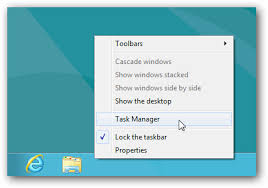
- You can also Press ALT+Ctrl+Del to Start Task Manager.

- When the Task Manager Windows will open you have to go to Process Tab.
- On Process Tab select Stolen Camera Finder related process and then click on End Process.
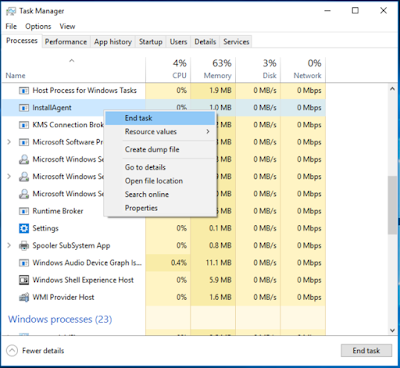
- Also go to the Task Tab and select the malicious task running On Windows system then click on End Task.
Part 2 : Get Rid Of Stolen Camera Finder From Control Panel On Windows System
Get Rid Of Stolen Camera Finder From Windows 10
- Click on Start Menu then go to Settings option to choose System Option.
- Here on Settings panel choose System option >>> select Apps and Features option.
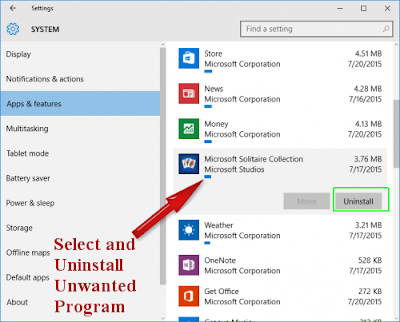
- On App and Features Panel Find Stolen Camera Finder >>>> then press Get Rid Of option.
Get Rid Of Stolen Camera Finder From Windows 8
- On Windows 8 press Win+R button to open Run Box.
- Type control panel and hit Enter button on search box.
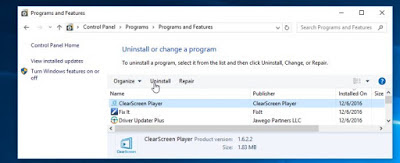
- On Control Panel Windows select Get Rid Of a program.
- Find Stolen Camera Finder and click on Get Rid Of.
Get Rid Of Stolen Camera Finder From Windows 7
- Press Windows Button to open All program list on Windows 7.
- From All Program List select Control Panel Option.
- Or Press together Win+R button.
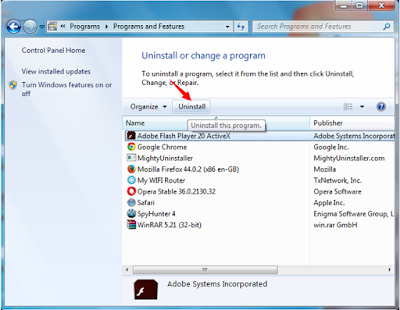
- The select Programs menu again click on Uninstall a programs.
- Select the program which want to Get Rid Of then click on Get Rid Of icon.
Get Rid Of Stolen Camera Finder From Windows XP
- Open Start menu then select Control Panel on your Windows XP.
- On Control Panel windows click on Add or Remove programs option.

- A list of installed program will appear.
- Now from this list find Stolen Camera Finder >>> the click on Get Rid Of option.

Part 3 : Get Rid Of Stolen Camera Finder From Web Browser
Get Rid Of Stolen Camera Finder From Microsoft Edge
- Click on More (...) icon on your Edge Browser.
- To Set a URL click on A specific page or pages option.
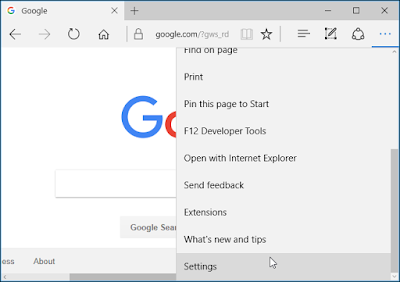
- Type the URL of the page on the Custom Option.
- Restart your Microsoft Edge Browser to Set the change.
Get Rid Of Stolen Camera Finder From Mozilla Firefox
- To open browser menu >>> click on Setting icon (top right corner).
- Now select Add-ons .

- On Add-ons Manager tab select Extensions or Appearance panel.
- Find Stolen Camera Finder to Get Rid Of it then click on the Get Rid Of button or Trash option.
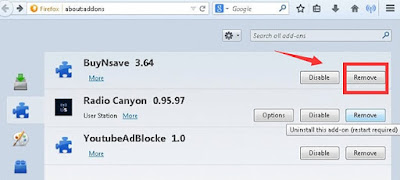
- Restart your Mozilla Firefox to see the change.
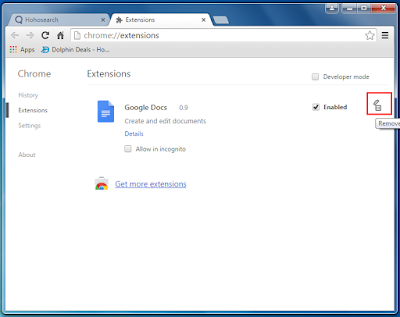
Get Rid Of Stolen Camera Finder From Google Chrome
- Click on 3 line icon (top right corner) to open Chrome menu.
- Now click on the Tools option from drop list.

- Select Extension and select all unwanted installed extensions.
- Click on trash icon to Get Rid Of Stolen Camera Finder from Google Chrome.
Get Rid Of Stolen Camera Finder From Internet Explorer
- To open Tool Option Press Alt+T buttons.
- Also to open Tools option click on Gear Icon from the right-top corner.
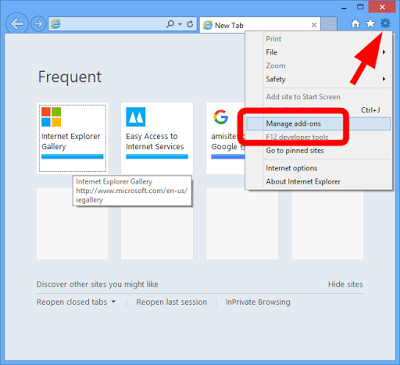
- Click on Manage Add-ons option then select Toolbars and Extensions tab.
- Find Stolen Camera Finder and related add-ons then Click Disable.
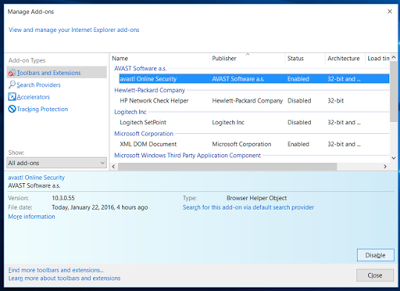
- Finally click on Get Rid Of button.
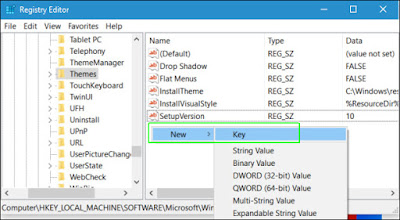
Part 4 : Get Rid Of Stolen Camera Finder From Registry Editor
- Type regedit and hit Enter or Press OK on RUN command to open Windows Registry Editor.
- On the Windows Registry Entry Press CTRL+F key to enable search box.
- Find Stolen Camera Finder and Get Rid Of all related registry files of it.
HKEY_LOCAL_MACHINEOSCurrentControlSetServicesWpm
HKEY_CURRENT_USERSoftwareMicrosoftInternet ExplorerMain Default_Page_URL
HKEY_LOCAL_Machine\Software\Classes\[Threat name]
HKEY_CURRENT_USER\Software\Microsoft\Windows\CurrentVersion\Run .exe
HKCU\Software\Microsoft\Windows\CurrentVersion\Internet Settings\random
HKEY_LOCAL_MACHINE\SOFTWARE\Microsoft\Windows\CurrentVersion\run\random
HKEY_CURRENT_USER\Software\Microsoft\Windows\CurrentVersion\Internet Settings
Part 5 : Start Your OS in Safe Mode With Networking
Get Rid Of Stolen Camera Finder For Windows 8/10
- Click on Start Menu, hold Shift key and the press Restart button.
- In next Window select Troubleshoot option.
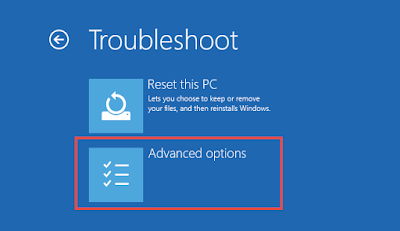
- Again click on Advanced Options.
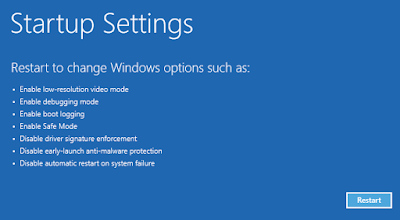
- Here select the Startup Settings option.
- Select Enable Safe Mode option then click on Restart button.
- Now Press F5 button for Enabling Safe Mode With Networking option.
Get Rid Of Stolen Camera Finder For Window XP/Vista/7
- Restart your OS to open in Safe Mode.
- Click Start Menu >> select Restart option.
- Simultaneously hit F8 button while the OS start booting.
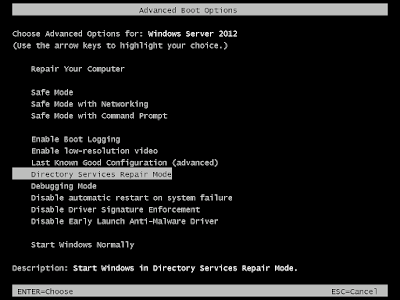
- Here you will get Advance boot menu.
- In this Advance boot menu then select Safe Mode With Networking Option.
- To open OS in Safe Mode With Networking press Enter button.
No comments:
Post a Comment